Windows配置Nginx自签名证书,访问本地https请求
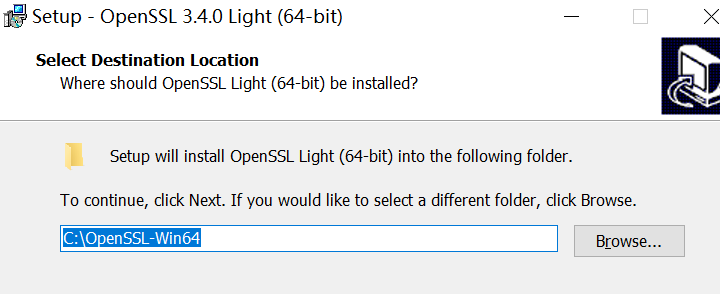
3.安装到C盘,然后一直下一步即可。
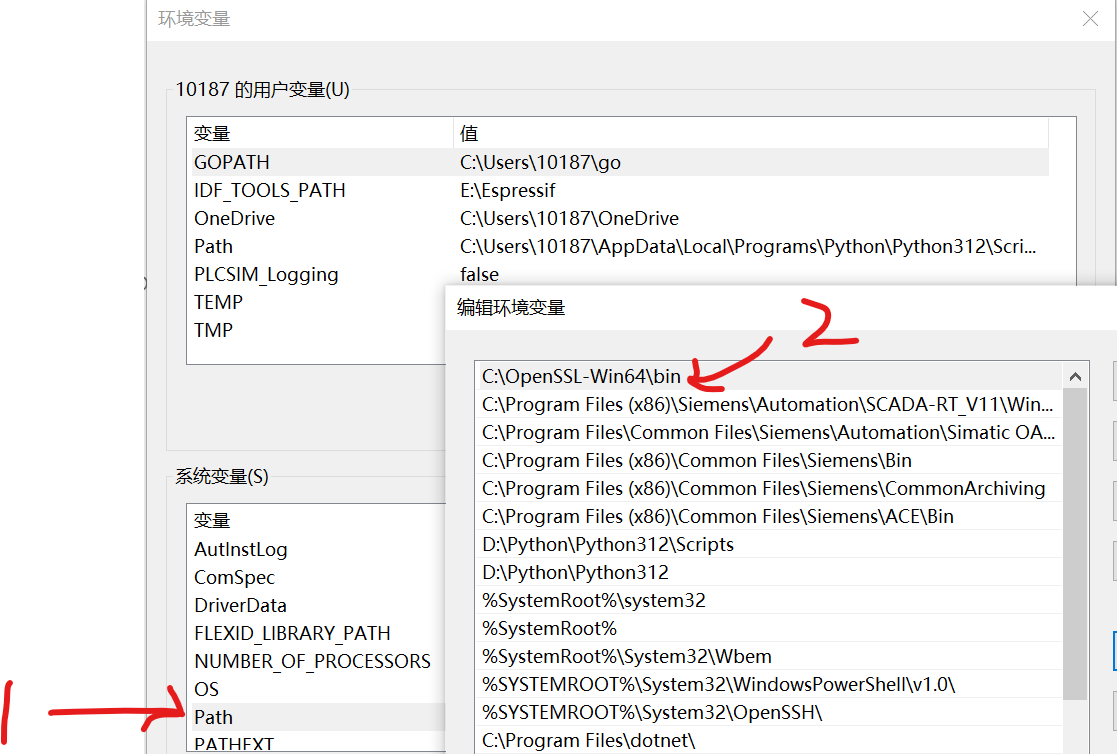
4.将openssl.exe所在目录添加到环境变量
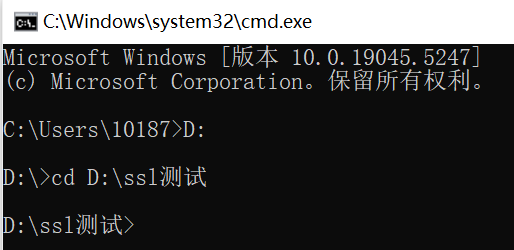
5.新建一个目录保存保存自签名文件

6.打开CMD,进入刚刚创建的空目录
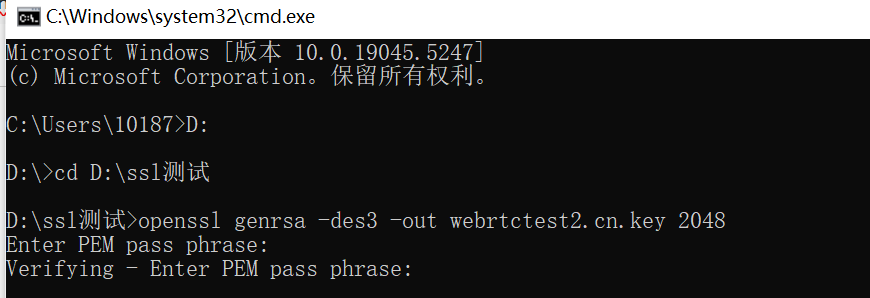
7.创建私钥文件,我使用的域名为:webrtctest2.cn,可以根据自己情况修改,记着后续域名也要跟着修改
openssl genrsa -des3 -out webrtctest2.cn.key 2048
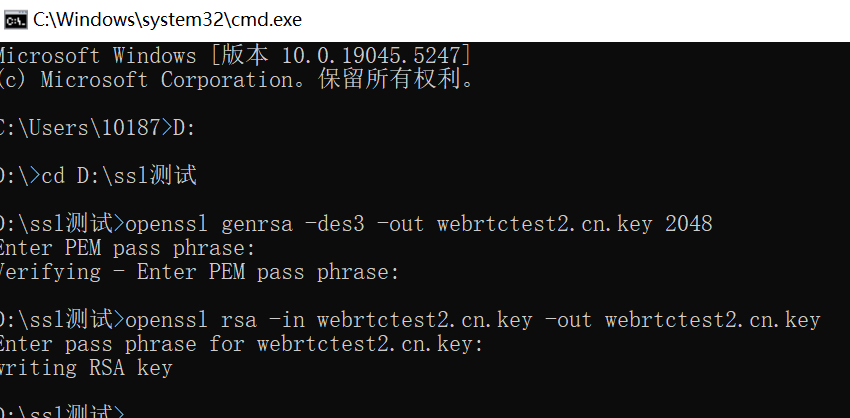
8.去除密码保护
openssl rsa -in webrtctest2.cn.key -out webrtctest2.cn.key
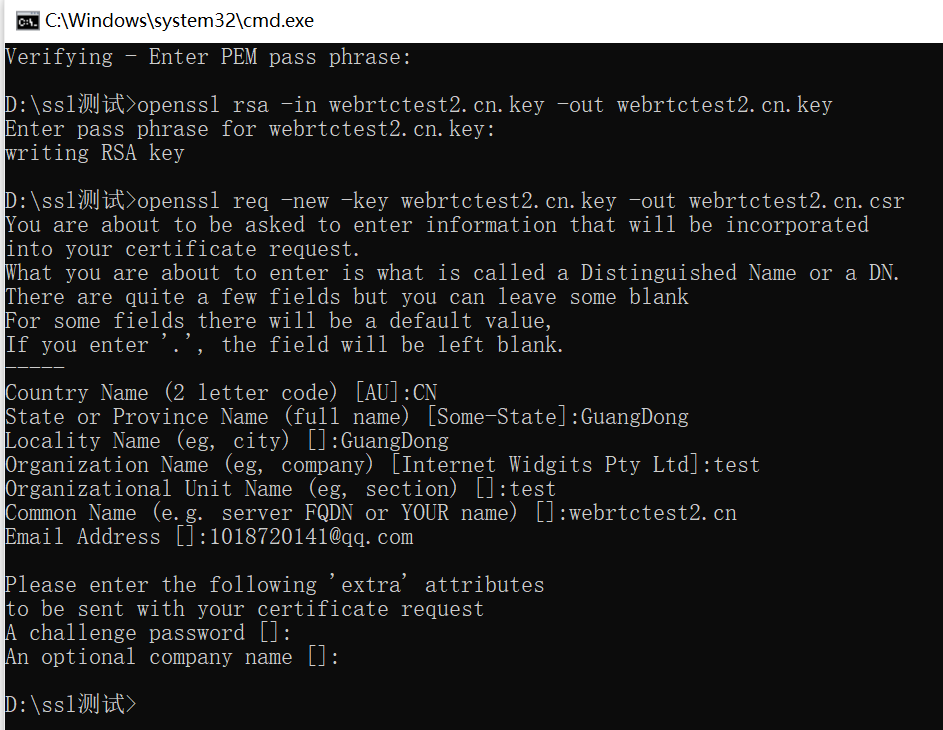
9.创建请求证书
openssl req -new -key webrtctest2.cn.key -out webrtctest2.cn.csr
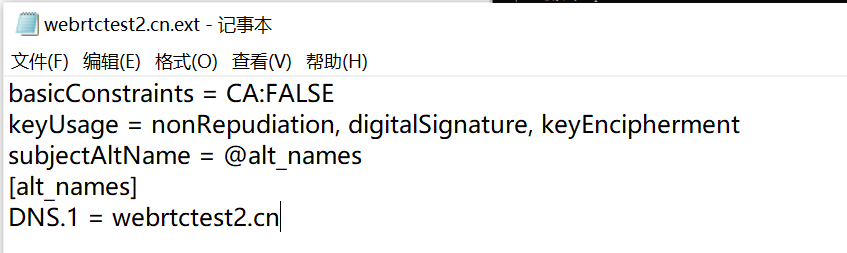
10.手动创建一个文本文件并修改文件名为: webrtctest2.cn.ext,编辑内容为:
basicConstraints = CA:FALSE
keyUsage = nonRepudiation, digitalSignature, keyEncipherment
subjectAltName = @alt_names
[alt_names]
DNS.1 = webrtctest2.cn

11.生成证书
openssl x509 -req -days 36500 -in webrtctest2.cn.csr -signkey webrtctest2.cn.key -out webrtctest2.cn.crt -extfile webrtctest2.cn.ext

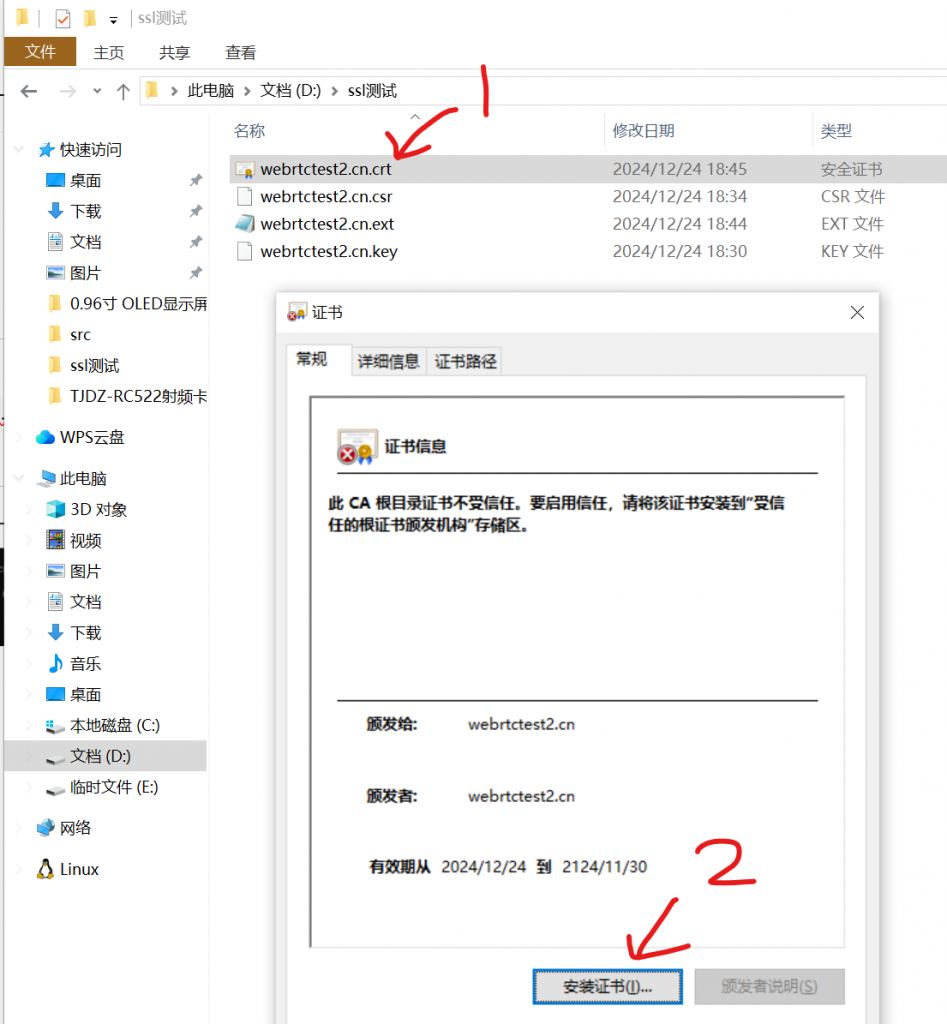
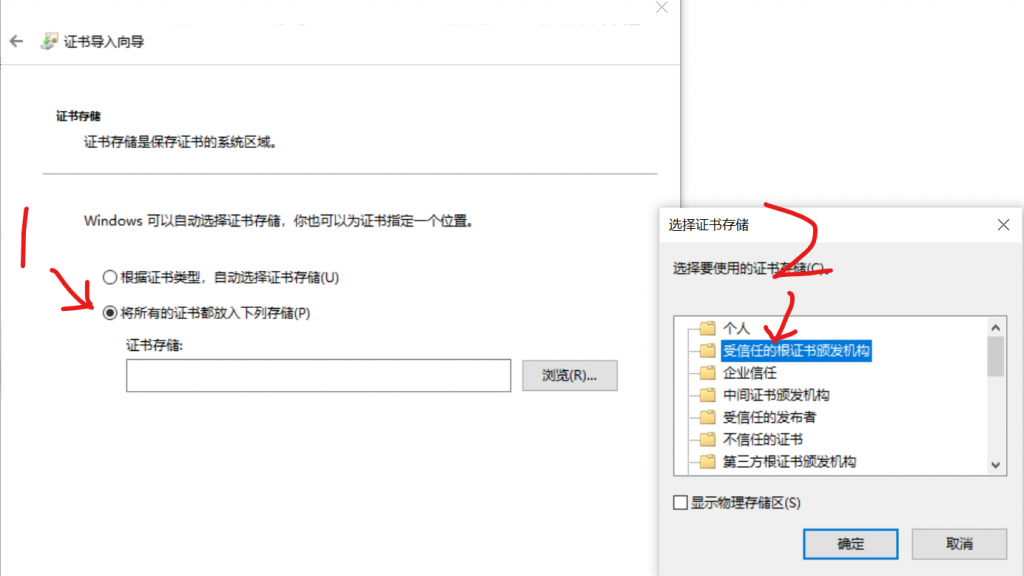
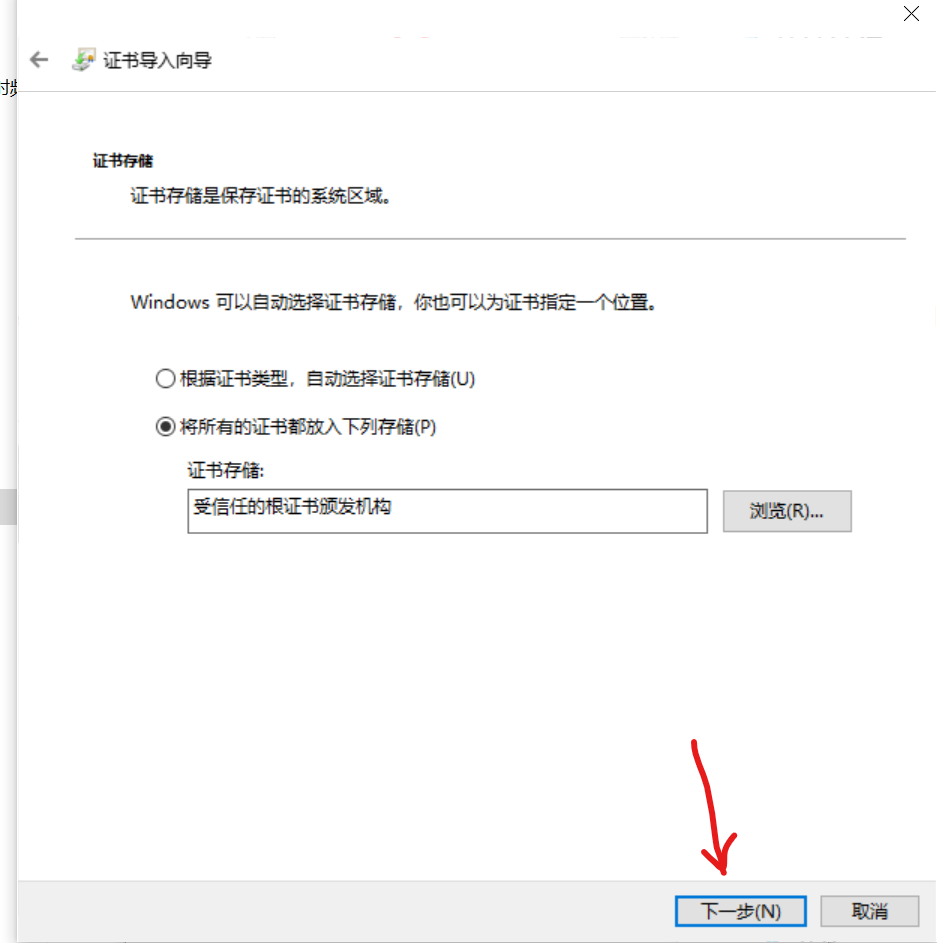
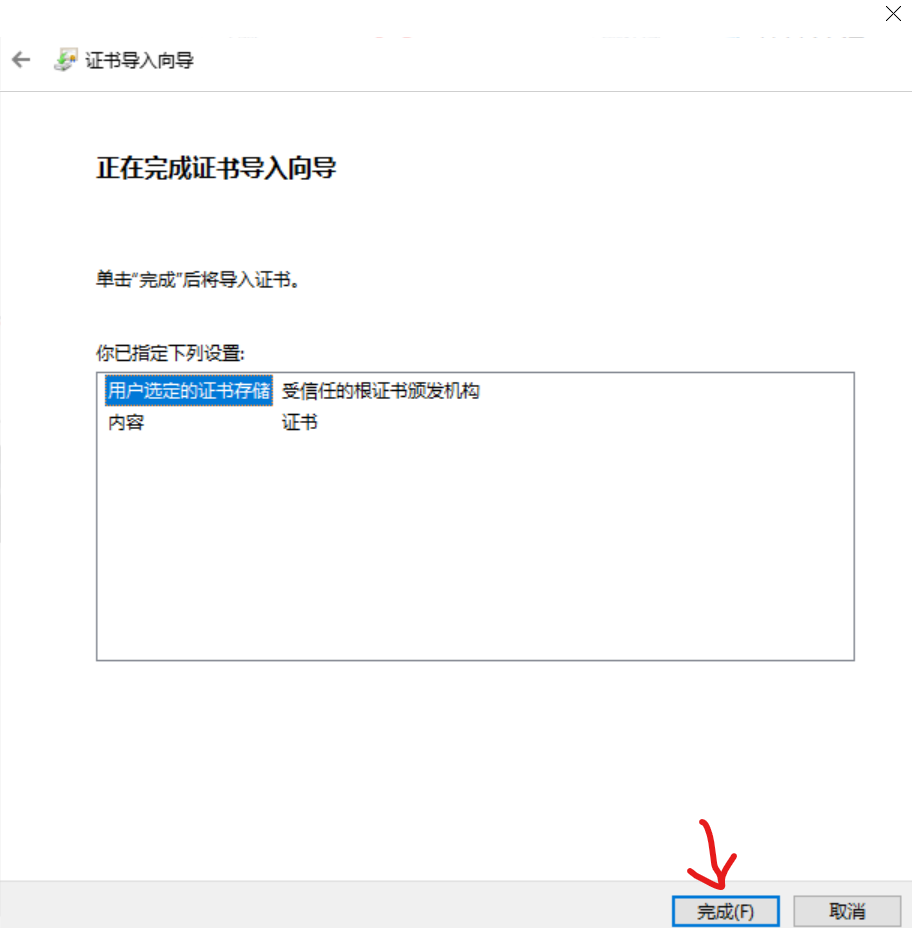
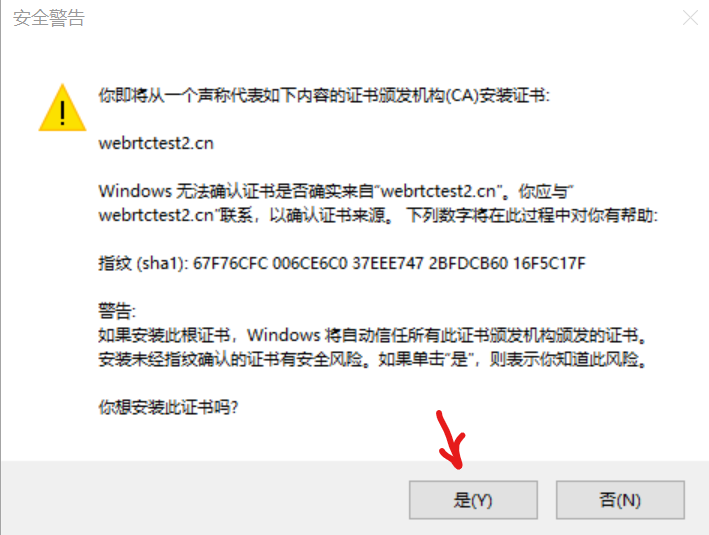
12.双击webrtctest2.cn.crt,安装证书
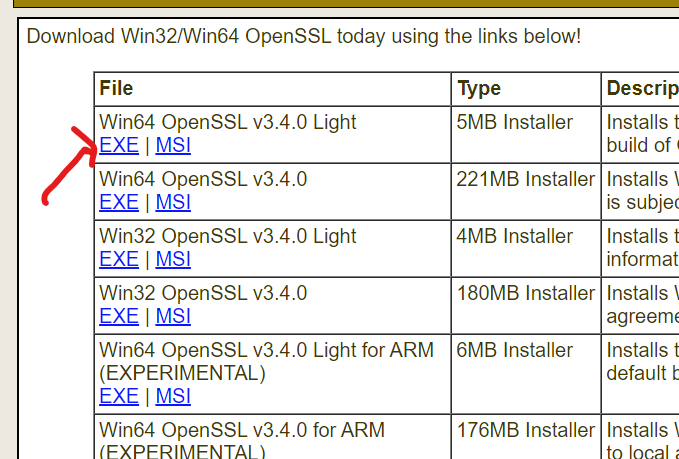
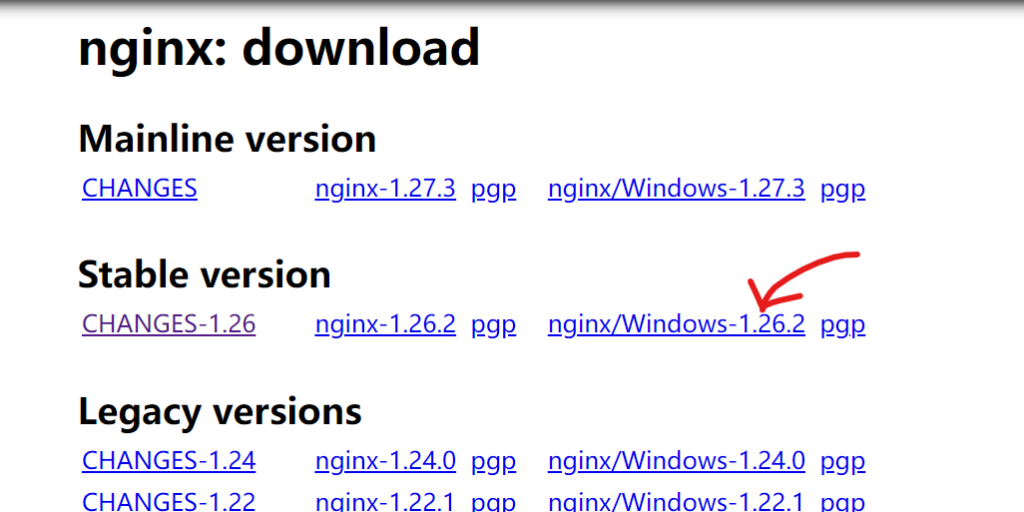
13.下载Windows预编译的Nginx:http://nginx.org/en/download.html
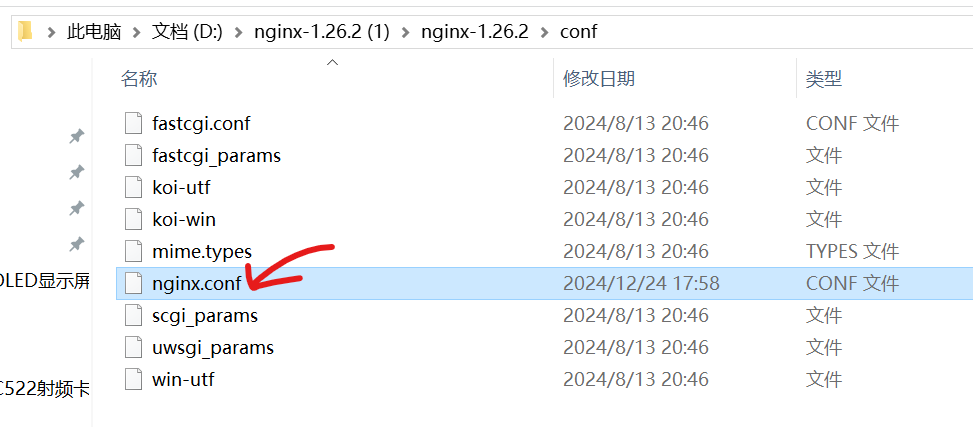
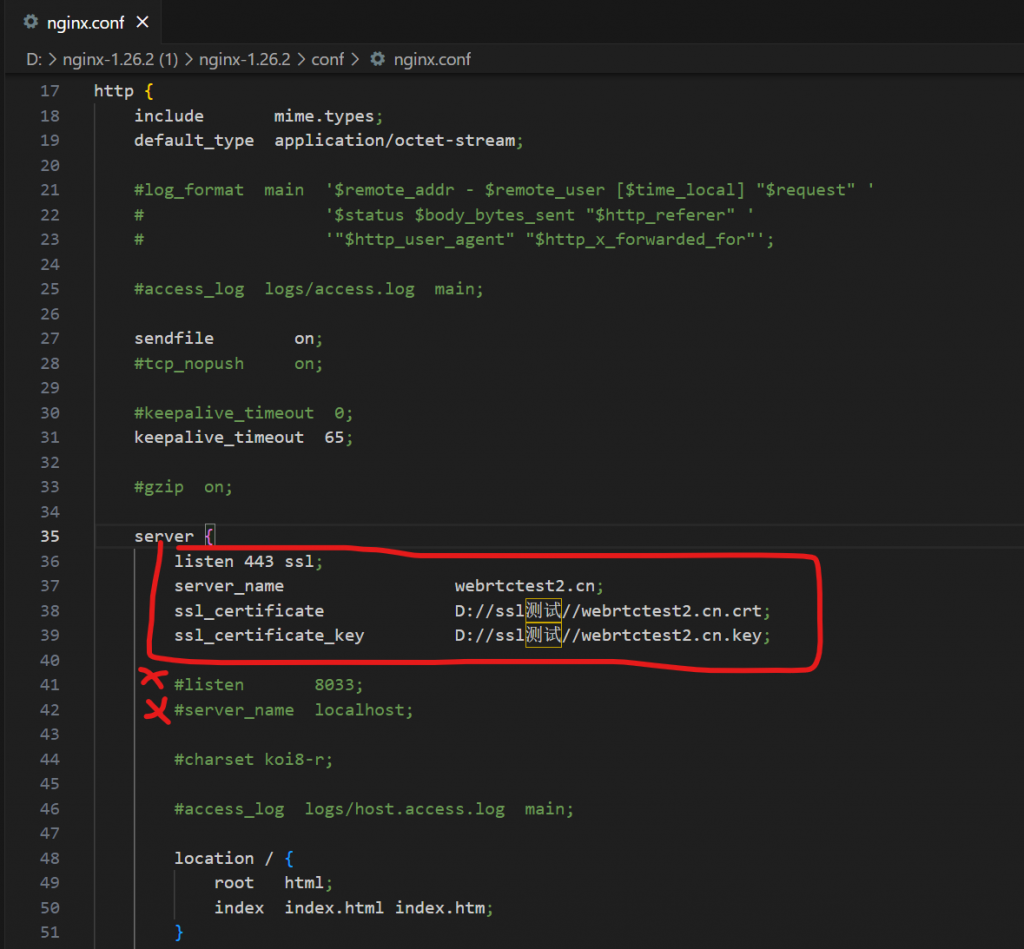
14.解压后,编辑文件nginx.conf,添加修改内容:
listen 443 ssl;
server_name                 webrtctest2.cn;
ssl_certificate             D://ssl测试//webrtctest2.cn.crt;
ssl_certificate_key         D://ssl测试//webrtctest2.cn.key;
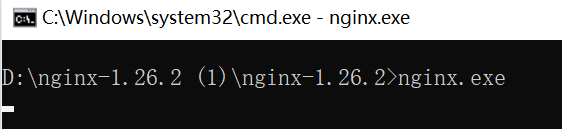
15.打开CMD,启动Nginx
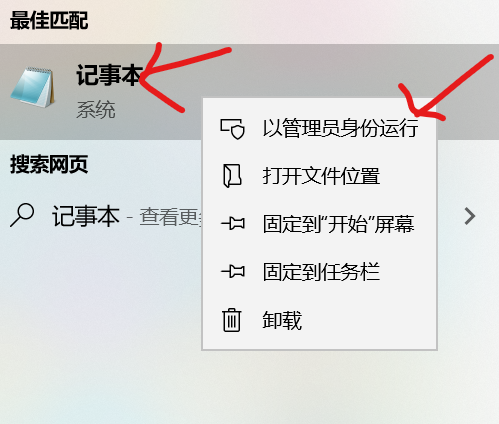
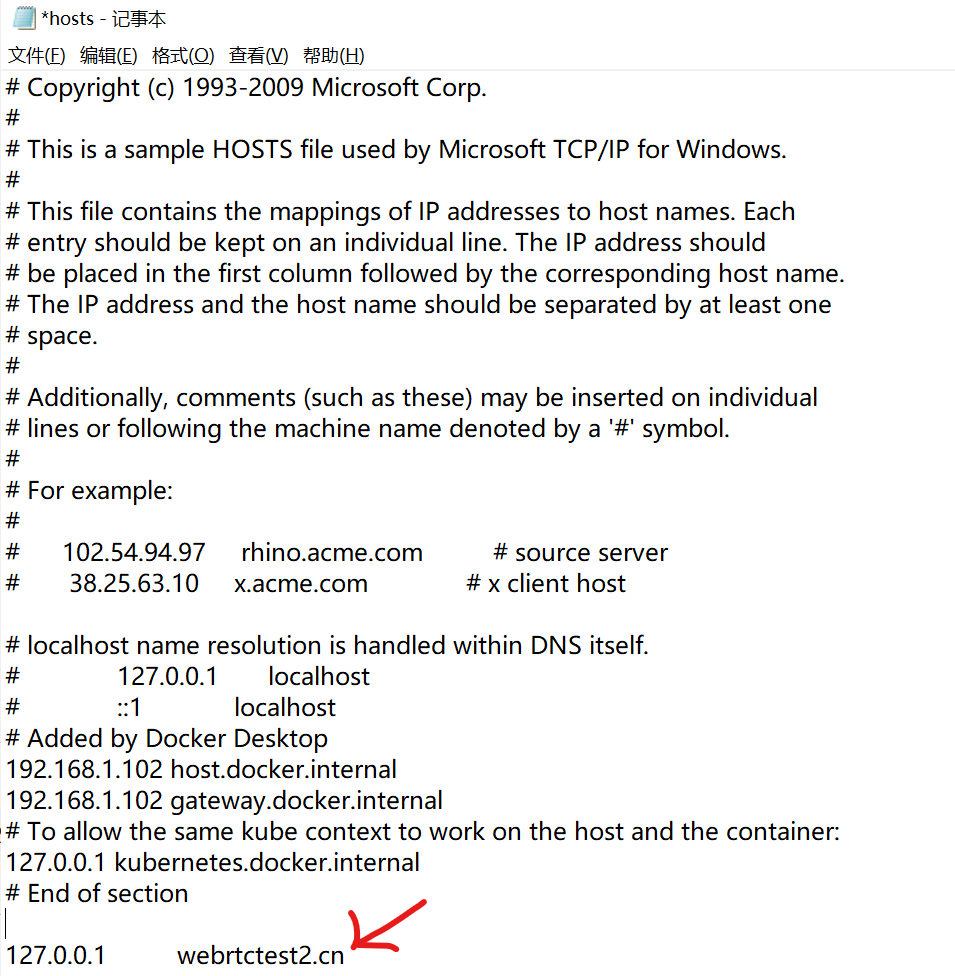
16.搜索记事本,右键以管理员打开记事本,然后打开文件:C:\Windows\System32\drivers\etc\hosts,末尾添加内容并保存:
127.0.0.1 webrtctest2.cn
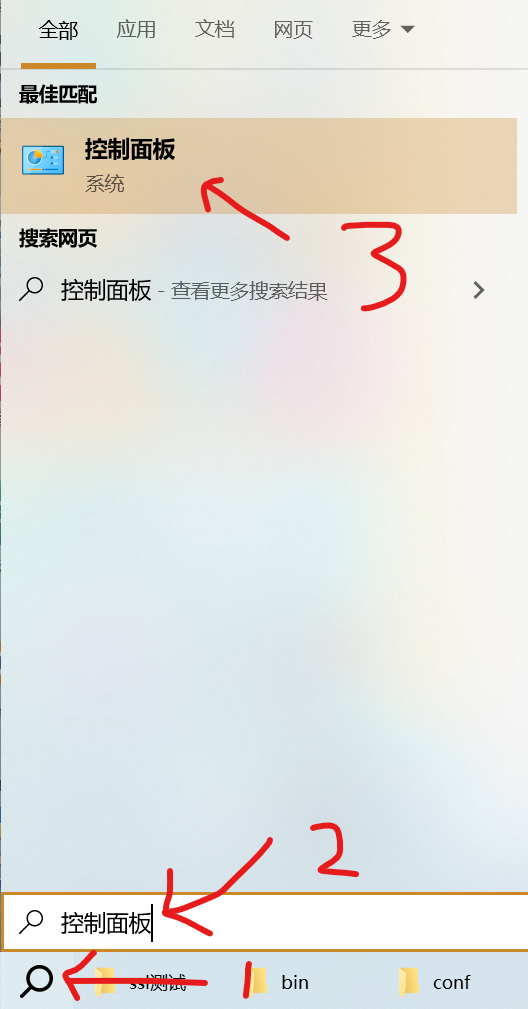
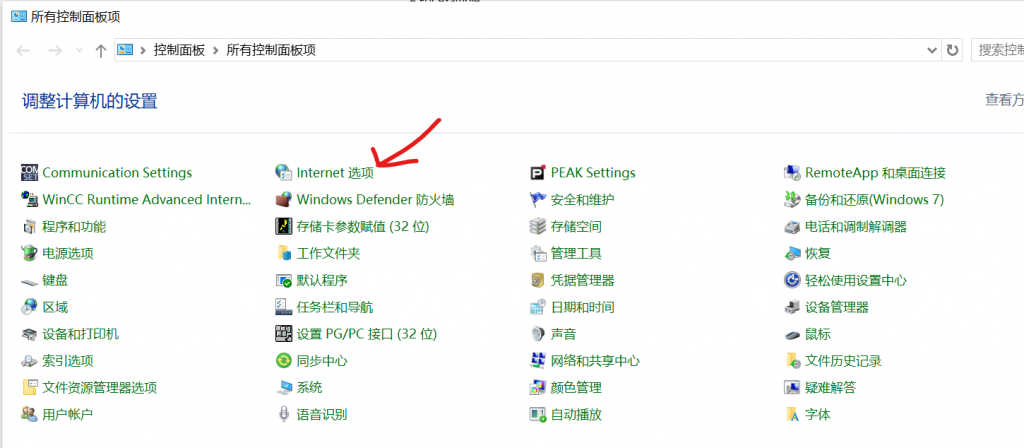
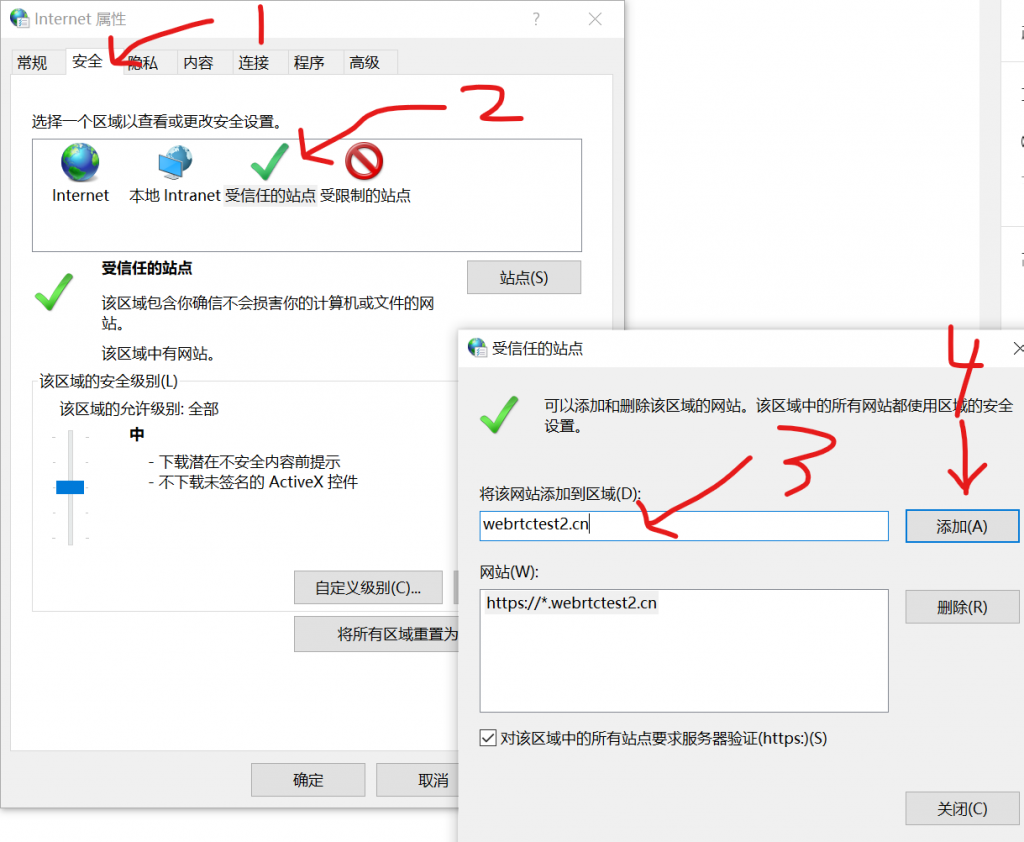
18.打开控制面板,打开Internet选项,添加信任站点,具体看图:
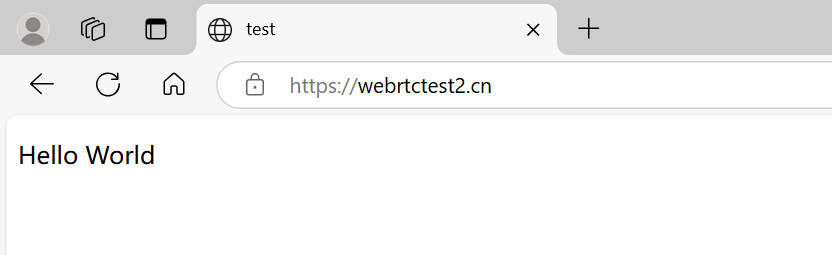
19.必须关闭浏览器,重新打开浏览器,输入地址:https://webrtctest2.cn